
Session data cloud synchronization is actually a terrifying thing, because once session information is leaked, it involves not only the company’s property issues, but also the personal future and future.
So we designed this solution with full consideration of this.
Firstly, it is built based on the standard SFTP protocol, which is based on SSH2 and its security and reliability are globally recognized.
Secondly, the official does not provide a cloud warehouse, but you can specify the server and storage path of the cloud warehouse, which is also convenient for the team’s cloud warehouse management.
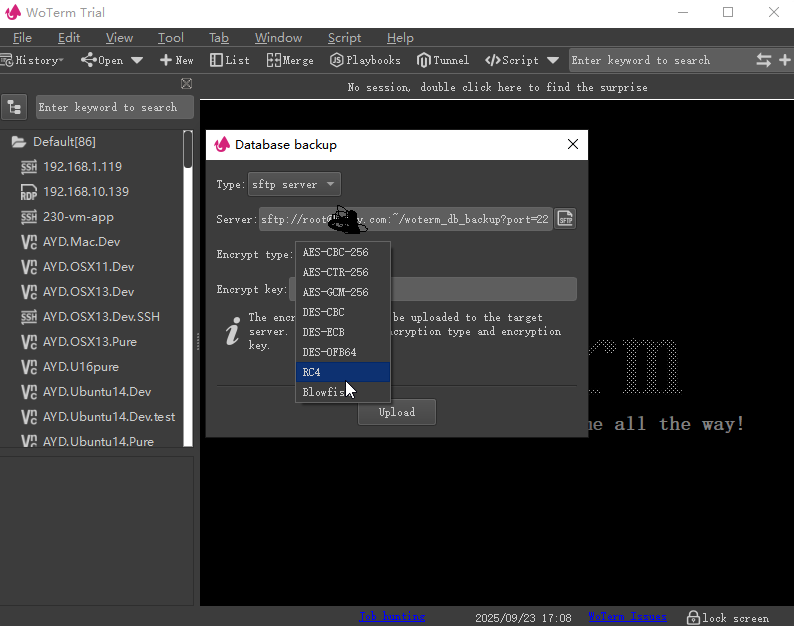
Next, the client provides 8 high-strength encryption algorithms. Users can choose one encryption method according to their personal preferences, but they must save their personal password. Once forgotten, no one can retrieve the data for you.
Moreover, cloud data is encrypted on the Client-side encryption and then uploaded. The server does not store any encryption type or password information. Even if it is leaked, the cracker needs to guess the encryption type and encryption key at the same time to correctly crack it. This is more reliable than a single encryption method, or the time to be cracked will be longer.
Finally, it provides unrestricted historical backup and differential merging of data, addition, deletion, and replacement, which can meet the needs of different scenarios such as homes and companies.
Next, let’s experience the entire process of backup and recovery:
Step 1: We will first perform a database backup.
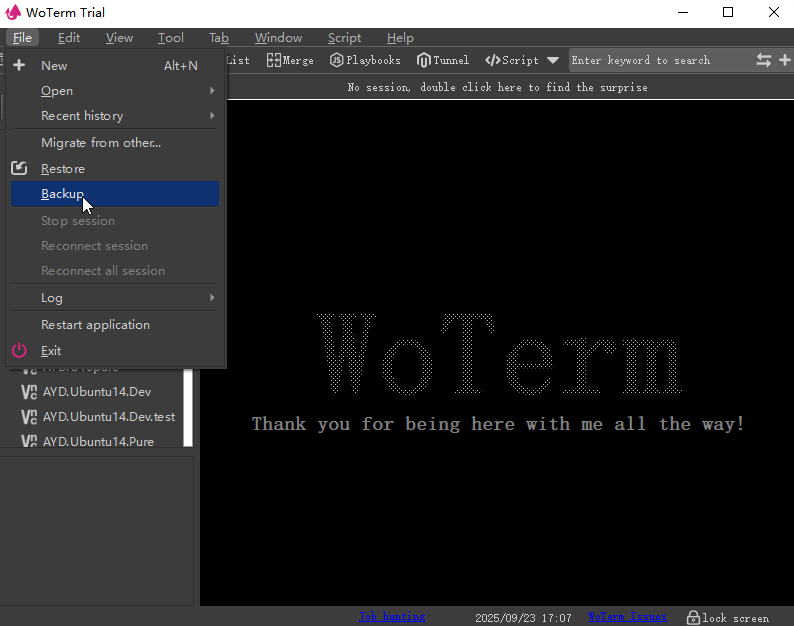
Find the menu entry for ‘Backup’ or ‘Restore’ from the main menu ‘File’.
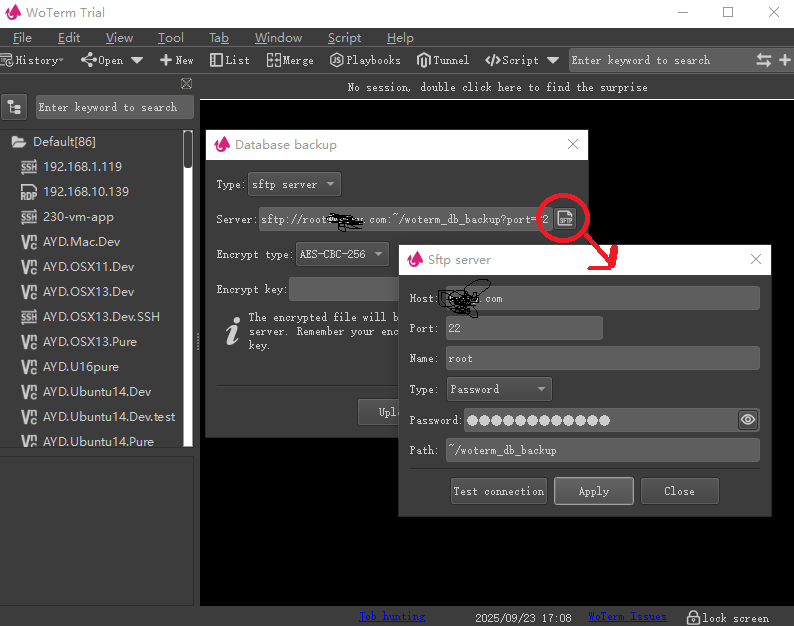
Step 2: Open the backup dialog box, which provides two backup methods, namely SFTP server backup and local file backup. We choose the SFTP server backup method.
When running for the first time, the basic configuration of the SFTP server needs to be entered, as shown below.
Step 3: Select a preferred encryption type and enter the password. This password is only saved in the local configuration and will not be uploaded to the server. So don’t forget, otherwise you won’t be able to retrieve the data.
Each upload only encrypts the current operation, so different encryption types and passwords can be selected for each upload.
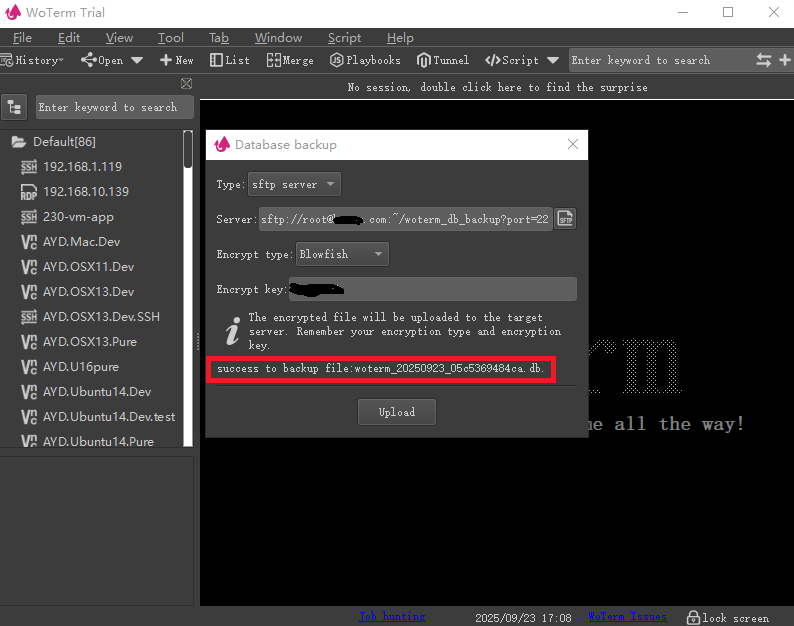
Step 4: After the configuration is completed, click Upload, and there will be corresponding success or failure prompts. At this point, the cloud backup of the database will be completed.
Step 5: Find the function entry of ‘Restore’ from the ‘File’ menu and open the database recovery dialog box. It will remember the previous server configuration information, so there is no need to enter it again at this time and click the ‘Next’ button directly.
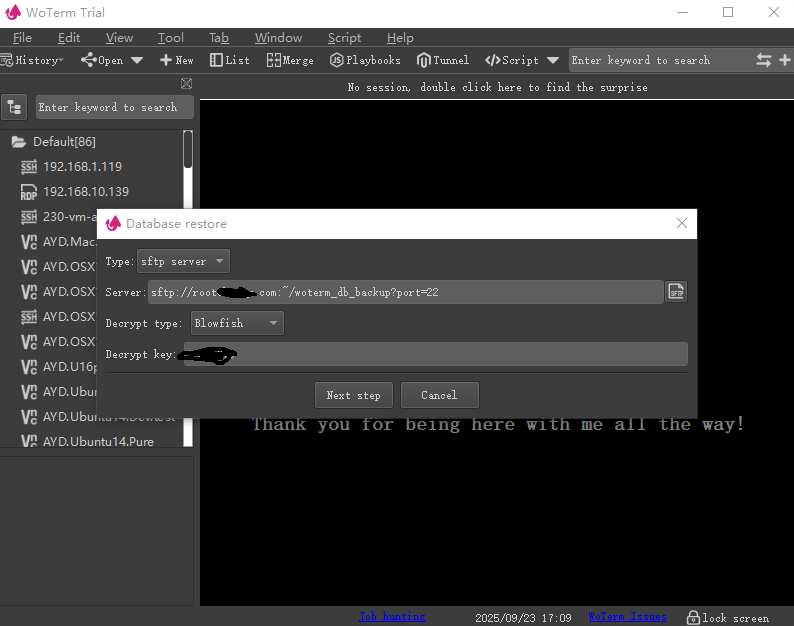
Step 6: Download the most recent backup file directly and perform file decryption. Then compare with local data records to display the merged differentiated information.

Step 7: You can also select a history record that you like from the backup history to restore.
